
Users and roles
Everyone who works in Excelia CRM has their own account. Company admins add people on Settings → Users and decide what each person can do with a role. The CRM comes with built-in roles (Company admin, Sales manager, Team leader, Sales agent, Finance, Marketing), and on Settings → Roles you can make your company's own roles with exactly the rights you want.
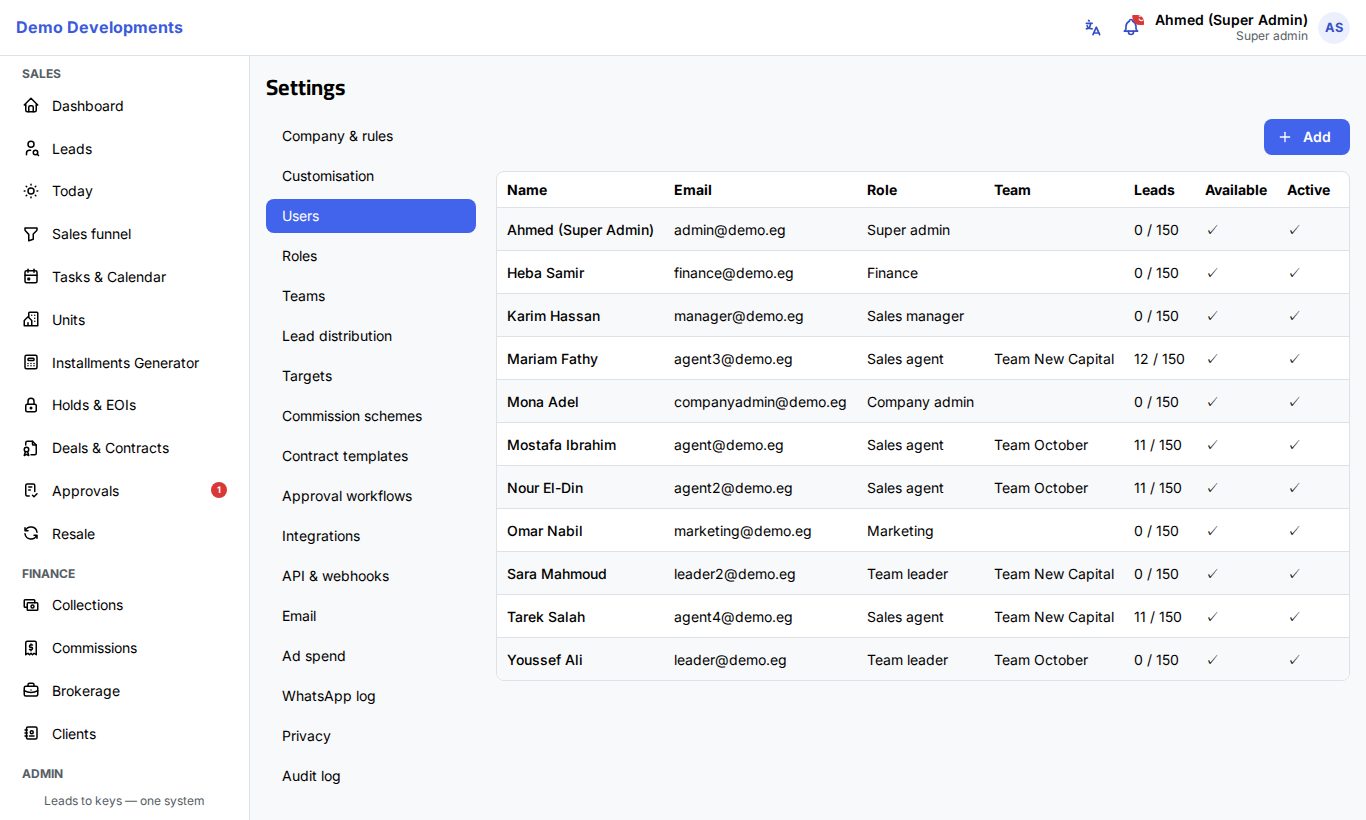
The users list
Settings → Users lists everyone in your company with their Name, Email, Role, Team, their open leads against their limit (for example "35 / 150"), whether they are Available and Active, their Last login and whether two-factor sign-in (2FA) is on. Deactivated people appear faded.
Someone who has not accepted their invitation yet has the label Invitation pending next to their name.
Invite a person
Admins never choose or see other people's passwords. Each new person receives an e-mail invitation and chooses their own password.
- On Settings → Users, click Add.
- Fill in:
- Name and Email (required). The e-mail is the person's sign-in name and must not be used by another account.
- Phone.
- Role: a built-in role or one of your company roles (see below).
- Team: the team the person belongs to.
- Max open leads: the most open leads the person can hold; lead distribution skips them when they reach it (150 by default).
- Language: Arabic or English, for the app and for their e-mails.
- Lead languages: the languages they can serve; lead distribution uses this to match leads by language.
- Leave Active and Available ticked (Available means the person can receive new leads).
- Click Save. A message confirms Invitation emailed to ….
The person clicks the link in the e-mail, chooses a password and can sign in. The link works for 72 hours.
Your plan's user limit
Your plan allows a set number of active users (shown on Settings → Company & rules). When you reach it, you cannot add more people until you deactivate someone or change your plan.
Resend an invitation
If the invitation expired or got lost, click Resend invitation next to the person in the list. A new link is e-mailed; only the newest link works.
Change a person's details
- Click the edit button next to the person.
- Change what you need: name, e-mail, phone, role, team, lead limit, language, Active or Available.
- Click Save.
When you change someone's e-mail, role or team, or deactivate them, they are signed out everywhere and sign in again with the new settings.
You cannot change your own role or deactivate yourself here. Your own name, phone and password are changed under your profile.
Deactivate someone who leaves
People are never deleted, so their history stays in place. To stop someone from signing in:
- Click the edit button next to the person.
- Untick Active.
- Click Save.
They are signed out at once and can no longer sign in. Deactivated people do not count towards your plan's user limit.
Help with passwords and sign-in
- Send password reset: e-mails the person a link to choose a new password. It appears for active people who have already set up their account.
- Reset 2FA: turns off two-factor sign-in for someone who lost their phone. Click Reset 2FA, then Confirm. Their trusted devices are forgotten. If your company requires two-factor sign-in for their role, they set it up again at their next sign-in.
- Sign out everywhere: in the edit window of a person, this ends every session on every browser and phone (for example after a lost phone). The person has to sign in again.
Super admins
Only a super admin can add, change, reset or sign out another super admin.
Company roles
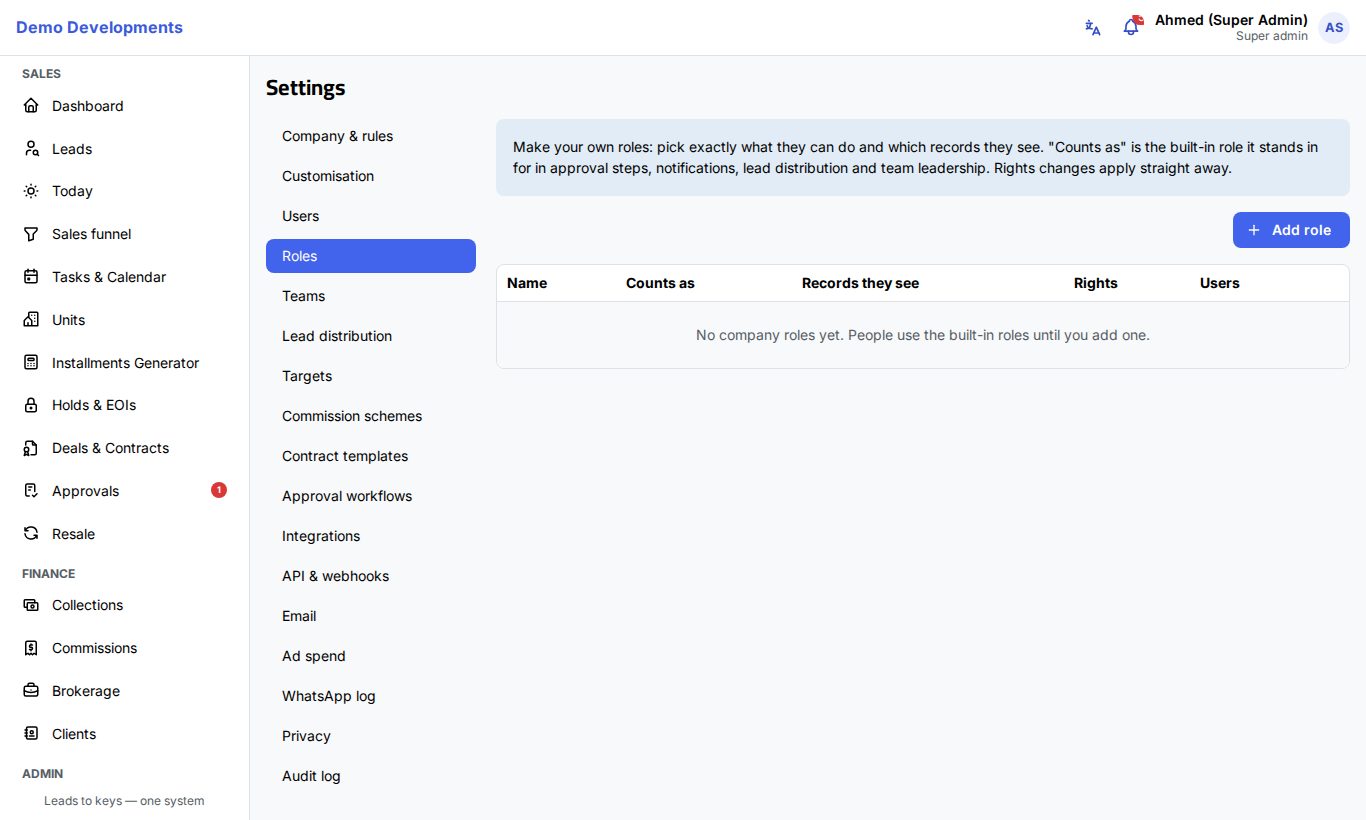
The built-in roles cover most companies. When they do not fit (for example a "Senior agent" who may also approve small discounts, or a "Receptionist" who only adds leads), make your own role on Settings → Roles.
The list shows each company role with what it Counts as, the Records they see, how many Rights it has and how many Users have it.
Make a role
- On Settings → Roles, click Add role.
- Give it a Name (Arabic) and a Name (English) (both required, different from your other roles).
- Optional: in Start from, choose a built-in role to copy its rights and records as a starting point.
- Choose what it Counts as (see below).
- Choose the Records they see:
- Their own: their own leads, deals and clients, plus the lead pool.
- Their team's: their own and their team members' leads, deals and clients, plus the lead pool.
- All: every record in the company.
- Under Rights, tick what people with this role can do. The rights are grouped (Leads and tasks, Clients, Inventory, Sales, Finance, Approvals, Reports, Settings and users). All and None at the top of a group tick or clear the whole group.
- Click Save.
Then give the role to people on Settings → Users: in the Role list, company roles are listed under Company roles, after the Built-in roles.
What "Counts as" means
Some parts of the CRM work by built-in role: approval steps, notifications sent to a role, lead distribution (only sales agents receive leads) and team leadership. Counts as is the built-in role your company role stands in for in those places. For example, a "Senior agent" that counts as Sales agent still receives leads from distribution.
It is also used for two-factor sign-in: if your company requires it for a built-in role, people whose role counts as that role must use it too.
Change or delete a role
- Click the edit button next to the role, change it and click Save. Rights changes apply straight away.
- If you change what a role Counts as, everyone with the role is signed out and signs in again.
- To stop using a role, edit it and switch off Active, or delete it. Both are only possible when nobody has the role: give those people another role first.
Good to know
- You can only give rights you have yourself. Rights you do not have are greyed out in the role window (You can only give rights you have yourself), and you cannot give a wider view of records than your own. You also cannot edit or delete a role that has rights you do not have.
- Your own role is protected. If you have a company role, you cannot change what it counts as or remove user management from it, so you cannot lock yourself out.
- Role names are at most 60 characters.
- Only company admins (people with the right to manage users, teams and roles) see the Users, Roles and Teams pages.
- To see what each built-in role can do, read Roles and access.
- Every change to users and roles is recorded in the audit log.
Tip
Start a new role from the closest built-in role with Start from, then add or remove a few rights. It is quicker and safer than ticking everything by hand.